Showing posts with label Halloween. Show all posts

Tuesday, October 30, 2012

Homemade Lederhosen with out a pattern

I just wanted an excuse to carry around one of my instruments this Halloween, so I decided to make Lederhosen and go as a member of a polka band. 

No pattern? No problem!

Took my favorite pair of shorts that fit me really well and turned them inside out. Stuffing one leg inside the other.

I tapered the legs a bit cause I wanted them slightly more fitted. Also made them plenty long on the bottom so I could have a 2 inch cuff below the knee

Cut 2 front and 2 back. leaving room for a seem allowance. 

NOTE: Always cut BIG. You can trim it down later if you need to, but you can't always add fabric

 Sew the legs together by sewing one front to one back with right sides together. (you can tell the front from the back cause the back piece will have a deeper curve for the crotch piece. Or you can make them uniform...it's just a costume after all :)
 I cut mien too small. I could put them on, but they were SUPER tight, so I added a 2 inch strip down the out side. Which I ended up liking better anyway. :)
 Now turn one leg right side out and one inside out. Stuff the right side out leg into the inside out leg. 
 Line of the crotch pieces and pin together starting with the middle first so your in seems line up
 Since I cut them straight at the top and a waist line is curved, I put them on and folded over where I wanted the waist band to go. Pined it down and then cut along the fold. 
 To make them more fitted and less like sweat pants I put them on inside out and marked where I wanted the darts in the back (which by the way is nearly IMPOSSIBLE to do by your self). I I got a general idea of shape, placement, and size by looking in the mirror and then just eye balled it. 
I looked adn measured before I sewed to make sure the darts were straight and centered. And I got it just right. Whew!

Then I moved on to the embroidery. My mom has an Embroidery machine, so my plan was to go over and use it. Well....plans changed, she has been sewing like crazy getting ready for a wedding, so I had to go another route.

I drew up what I wanted it to look like with the help of Google Image search
 Then cut out around the shaped and traced them with a pen on my fabric, then I just filled in the lines when I took the paper off free hand. 
 Then I put in some nice orange thread and just sewed over the lines I had drawn...making it up as I go at some points :)


 Then I put the arrow shaped ones on the pants to mark where I needed to cut

 Right sides together I sewed the back on the arrow parts, then turned them right side out and dud a top stitch all the way around
 Did the same with the rectangle piece, but I left the bottom open so I could sew the arrow pieces into it. 
 Then I had to zig-zag stitch all around the waist and fly to keep it from unraveling, and added the waist band. It was just a long strip the length of my waist and about 4 1/2 inches wide. Then I put a top stitch on for decoration and to hold everything down. 
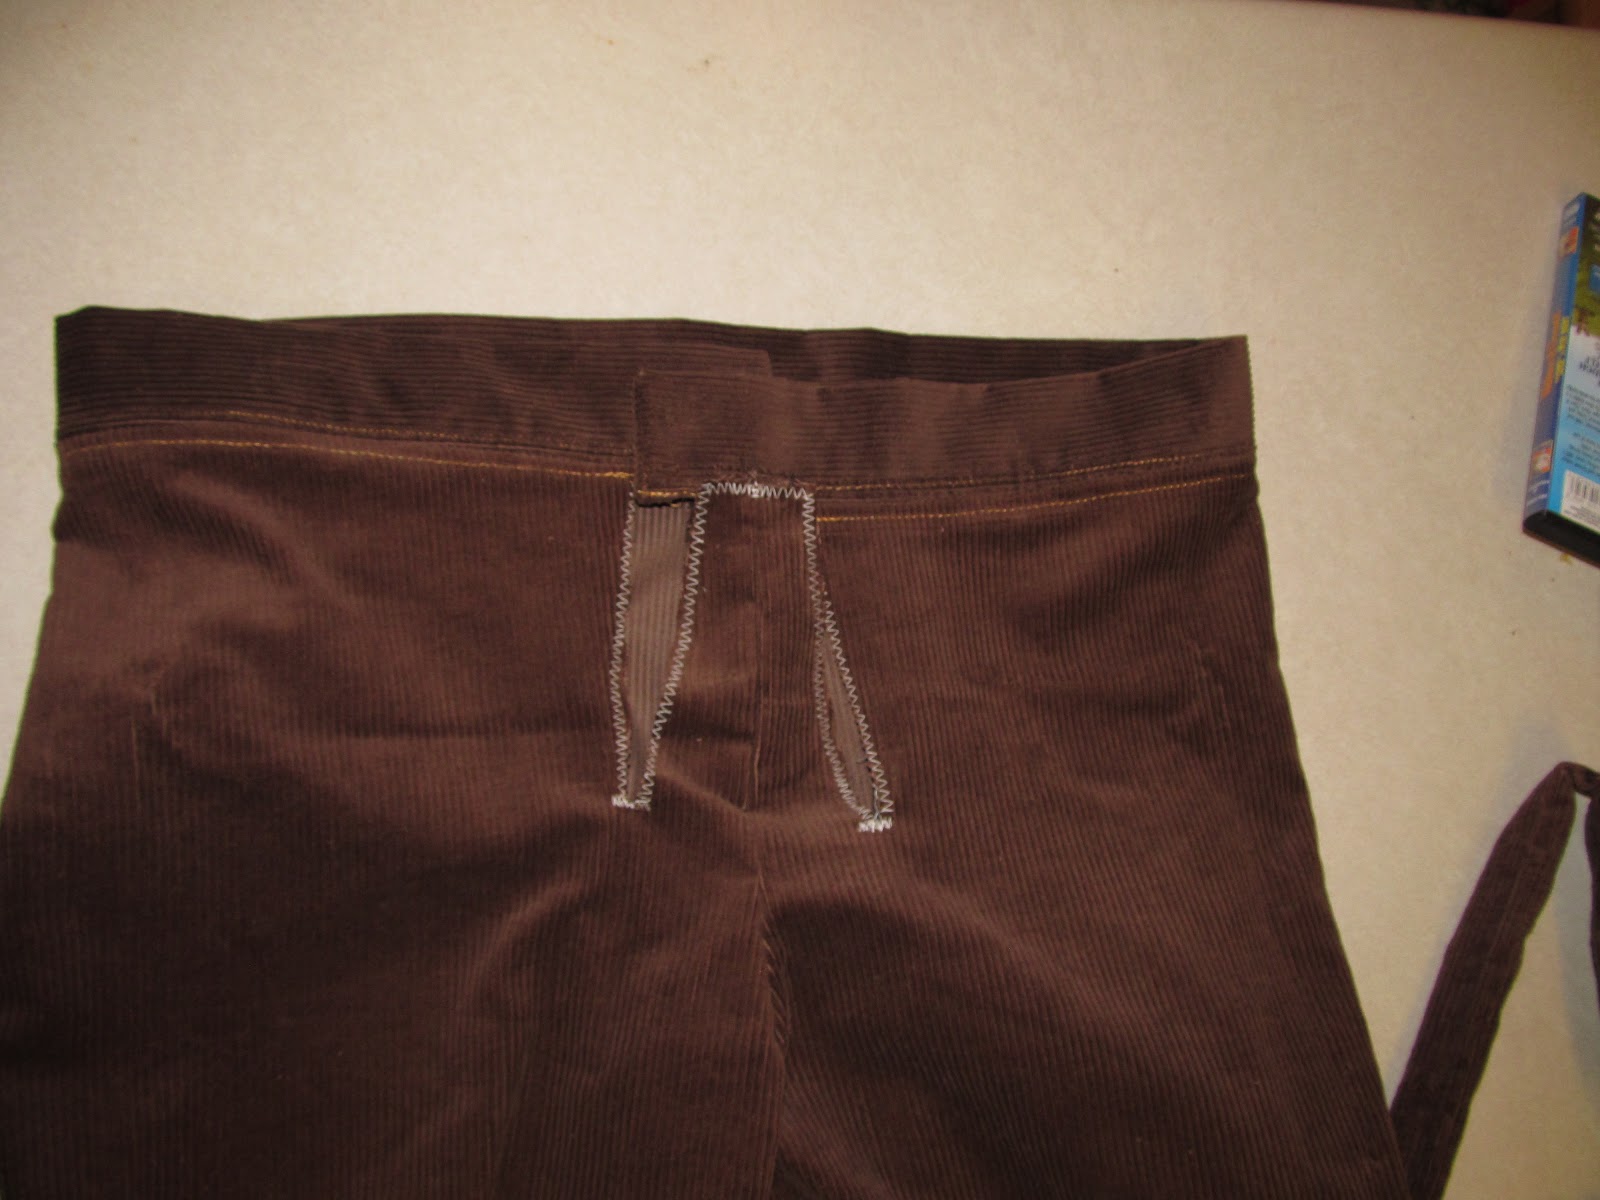
 Place the arrow pieces on and sew them toe the flap of the fly
 Then I did a totally unnecessary decorative stitch to accent it
 Slip the arrow pieces in the rectangle piece and sew them together with a top stitch going across the bottom of the rectangle. 

I added the suspenders next, making sure they were loose enough so I could bend over. I sewed them on, then added the buttons. Only one is actually useful  the one on the waist band. All 12 of the others are purely decoration. And with 13 buttons I'm SO glad I learned how to do it on my Machine. If you haven't done it yet, pull out your manual and try it! It's SO easy and saved so much time. 

I ended up using velcro to keep the fly up cause I sewed the button holes in too high, but it works great. 
 See, the buttons totally make this costume.
 Lederhosen has buckles on the straps. I didn't have buckles but I did have some D loops that fit, so I threw them on  just for kicks. 

NOTE: I don't ever throw a bag or belt away with out first ganking off all the straps buckles hooks or any other hard ware I can find. It comes in handy!
...now I just need to learn how to yodel...

Monday, October 15, 2012

Splatted Witch

Hilarious halloween decoration for your front yard. Start with 4 sticks of wood. Make 2 black for the arms, and paint 2 stripped for socks. You're going to need some long screws or nails to keep them sturdy on your tree. Then to keep it an all weather witch, use a black trash bag for the cape, and foam sheets for shoes and hair. Cut your shoes out and hair out. Just make the hair pointy so it sticks out of the bottom of your hat. Screw the shoes to the leg sticks and after your cape is up, nail your hair to the tree and the hat over top. A pair of rubber washing gloves stuffed with walmart sacks finish it off. And for that special touch, don't forget your stick witch broom. After the broom is made it takes a total of 3 minutes to put on your tree. If it's really windy tack down your hat, hair and cape so it covers your witch.

Homemade Witches Broom

A witches broom made from sticks in your backyard.

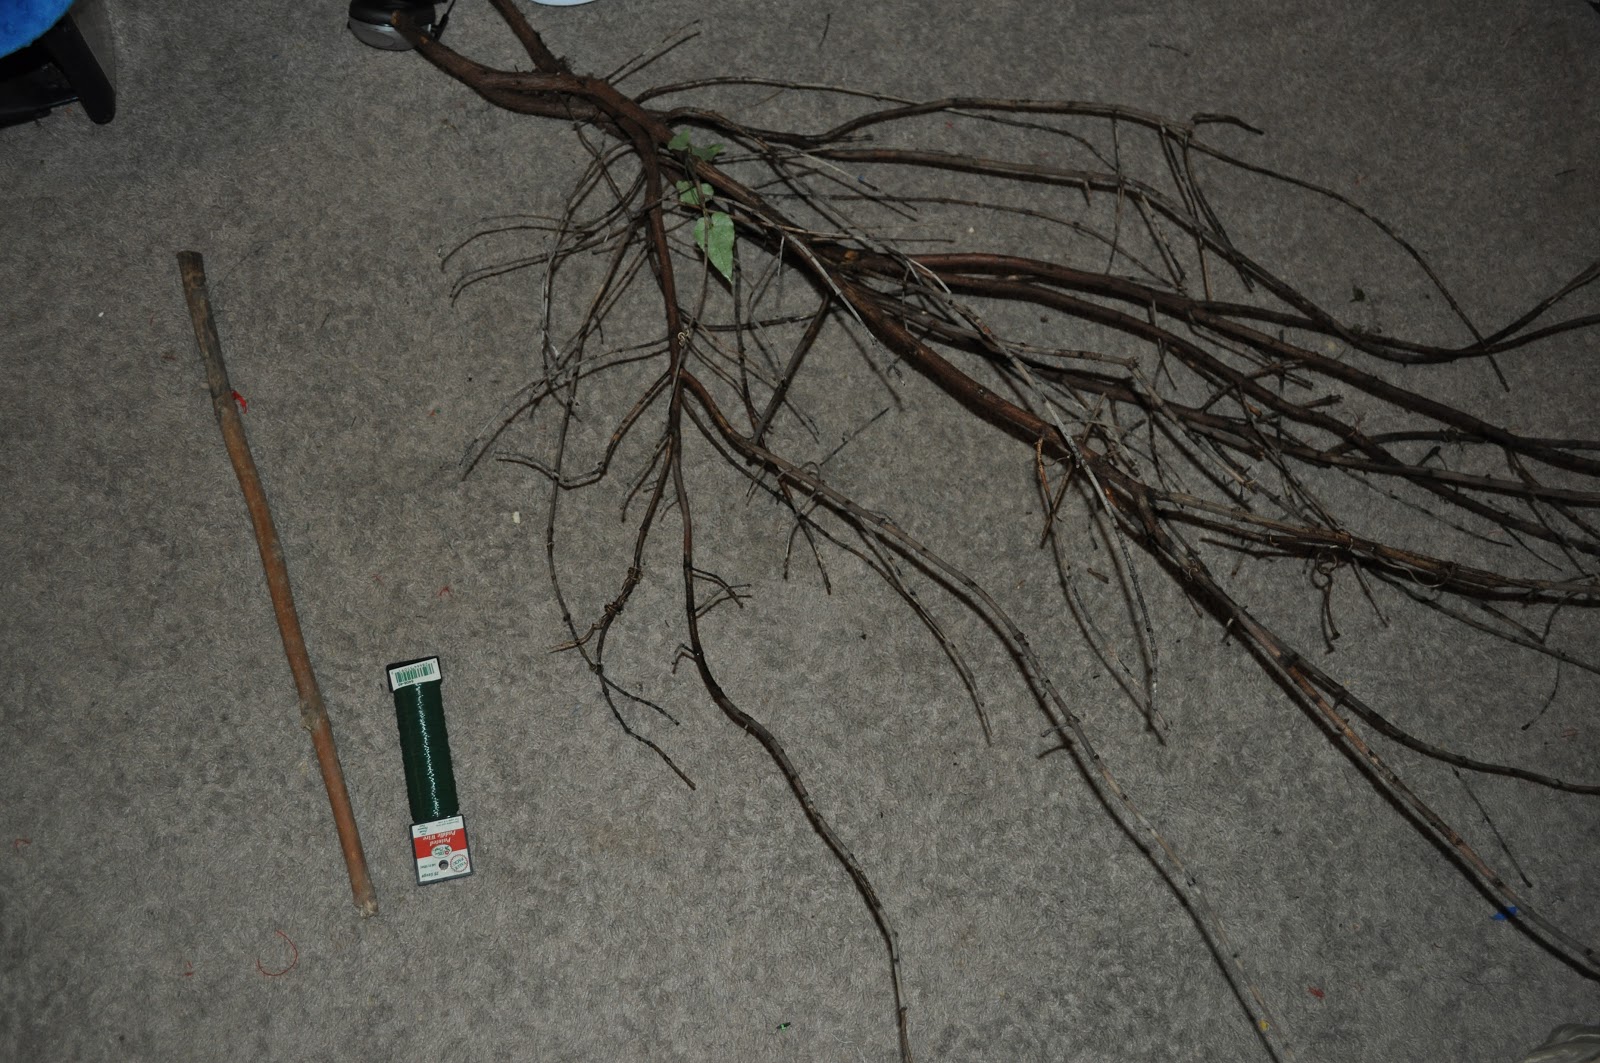
It's fall, that means windy days. Most of you probably have branches in your yard that have blown off your tree. So annoying to have so many branches in your yard. But I found a way to use those branches for halloween decorations. You'll need some sticks from your yard, and some floral wire, and hot glue wouldn't hurt either.

Break your branch into the same size pieces. Make two piles, one for smaller filler sticks, and one for the larger ones. Start with a wider straightish stick. Take some floral wire and wrap it around the end of one of you sticks from pile 2. Then attach to the bottom of your straight stick, and repeat. I must say this is VERY time consuming. But, it's a virtually free decoration. Once you have all your large sticks wrapped around, stick your smaller ones in as fillers. Then take a bendable twig (one that was fresh off the tree, or soaking wet works best) and wrap it around the sweeping part of your broom to give it the finishing touch. Hot glue wiggly pieces down and then set your broom where you will to give your house that spooky touch.

Also works great for a splatted tree witch.


Sunday, October 14, 2012

Captain America Shirt

Hooded Captain America Shirt.


Start by cutting out red and white strips of fabric (if you make them too wide, don't stress, just start over). Sew each strip of fabric in a red white red white pattern together.

Once they're sewn together, cut it into a mountain shape. Yeah you could go easy and make it straight...but it wouldn't look as much like the captain america in the movie. (but if the curve scares you, you can always skip this step.
 Now for the front of the shirt. Take a regular shirt that fits your kid and turn it inside out. Then lay it on your prefered fabric and fold in the sleeves so you can see the "outline" front piece. Cut your fabric around the shirt. (if it helps you can pin the shirt to the fabric like a pattern).
Now you lay your "mountain stripes" on the front of your cut out t shirt (remove the shirt you used as a pattern before this step), you can pin the stripes to the shirt to make them sit still, then cut off the bottom of your shirt to replace with the stripes. Now you just have to fold them together and sew them. EASY....maybe.


UH OH! The pieces don't just SEW together....hum. that takes some thinking..... Pin the middle of your stripes to the middle of your shirt. Now we can flip it over and work our way out.

Now pin the mountain corners . Tuck your blue fabric, but try not to make it tucked where you pin. you want this to look pretty much flat so just pull it tight while you pin it to the edges.

 Once the edges are pinned, sew carefully around your "mountain" taking out pins as you go. Go slow and turn your fabric as needed, and pull extra fabric away from the seams to keep it from puckering. If you're using an old t shirt you can skip this next part, but I used a sheet.....sheets unravel a lot, and quickly. So after you sew it, do a zigzag stitch on the edge to keep it from falling apart.

Now unfold it. WOW! that looks like the front of captain america's shirt....aren't you impressed?

Now take the shirt you were using for a pattern and put it on your blue fabric again. Fold the sleeves in again and cut out around it to make the back of your shirt. This time you don't have to cut off the bottom for the stripes. Now, put the outside of the pieces together so the seams will be on the inside of the shirt. Sew the shoulders together, and also sew just the straight part of the sides. **don't forget to back stitch at the beginning and the end of each seam** Now if using a fabric that unravels, do your zigzag stitch on the edges.    You should now have a sleeveless shirt when you turn it right side out. 

Next we make a hood (you can find instructions for that here) or you can skip. But in the movie...Captain America has a mask AND a hood underneath it. Just be sure if you skip the hood to zigzag/finish your edges on your neck hole. Have your child try on the shirt and the hood at the same time, mark with chalk, or straight pins (if your careful) where the shirt and the hood meet up on your child.

Once your hood is made turn it right side out. Turn your sleeveless shirt inside out.  Now, find the middle of the back of your hood by laying it flat, mark the middle with a straight pin. Find the middle of the back of your shirt as well (just fold it in half) and mark JUST THE BACK of the shirt with a straight pin. Then do the middle of the front of your shirt with another. Don't pin anything but your ONE piece of fabric that you're finding the middle of. Now, put your right side out hood upside down, in your inside out shirt, so the neck parts will sit together. Using your pins as a marker, pin the middle of the back of your hood to the middle of the back of your shirt. (Make sure you stay on your chalk/pinned line that you made earlier.) Pin your way around to the front making sure the middle of the front of the hood, meets up with the middle of the front of your shirt.

Picture of the hood and shirt sewn together.
Sew them together being careful not to sew on top of any other part of your shirt. Make your zigzag stitch around the edges to keep it from unraveling. Now turn it inside out and have your kid try it on. At this point...I was kind of regretting not using a fabric that stretched. My son couldn't get his head in his shirt, so I had to cut a line down the middle until he could fit through. Once I had the front cut I zigzaged the edges. I didn't bother turning in the raw edges. It's a costume, and looked fine with just a zigzag.

Sleeveless Hooded shirt. Now I was sad cause where the Captain America star is supposed to go, there is a great big slit. It's ok, I found a way to make it look right . But first, lets put the sleeves on the shirt.

If your pattern shirt has long sleeves just fold your fabric in half and put your sleeve on the fabric. Make sure you have the fold of your fabric where the fold of your sleeve is. Then cut it out. When you unfold your sleeve it should look like this. You will need two of these. If you don't have long sleeves on your "pattern shirt" no sweat. Just measure the length of your child's arm (from top of shoulder to wrist) and add a little extra for a seam allowance. 

Now my fabric had a soft side and a shinier side. I wanted the soft side on the inside. So make sure you always sew with you inside (the soft side) facing you. (unless told otherwise). Fold your sleeve in half with the soft side out, and sew up the long part of the arm. Make your zigzag stitch, then do the same to the other sleeve. **Don't forget to back stitch at the beginning and end of each seam** Turn your sleeves right side out. and once again, turn your shirt inside out. Pin the top of your sleeve to the top of the arm hole and work your way around. I would pin under the armpit last just in case you have to fold over the fabric to make it fit.

Sleeves sewed on. Inside out view.
Sew your arms on, being careful once again to keep the rest of your shirt out from under the presser foot. Do your zigzag stitch and turn the whole shirt right side out. It should be looking pretty awesome by now. Go ahead and finish off your sleeve edges and the bottom of your shirt with a zigzag stitch. Now for the star on the front.


Cut a star out of foam (or your fabric if you want, just make sure you finish the edges) and glue some velcro to the back. Sew on two squares of velcro on either side of your cut front of your shirt. (I just used velcro with adhesive on it, but beware when you sew it on with the adhesive it makes your needle sticky and might seize up your sewing machine) 


Now, velcro the star over top of your seam and TADA! Captain America at his finest.
I added an extra strip of blue fabric to the end of my sons shirt so it wouldn't com untucked while he was playing. Helps out tremendously.


Arrow Quiver from a Purse


Making a quiver out of an old purse.
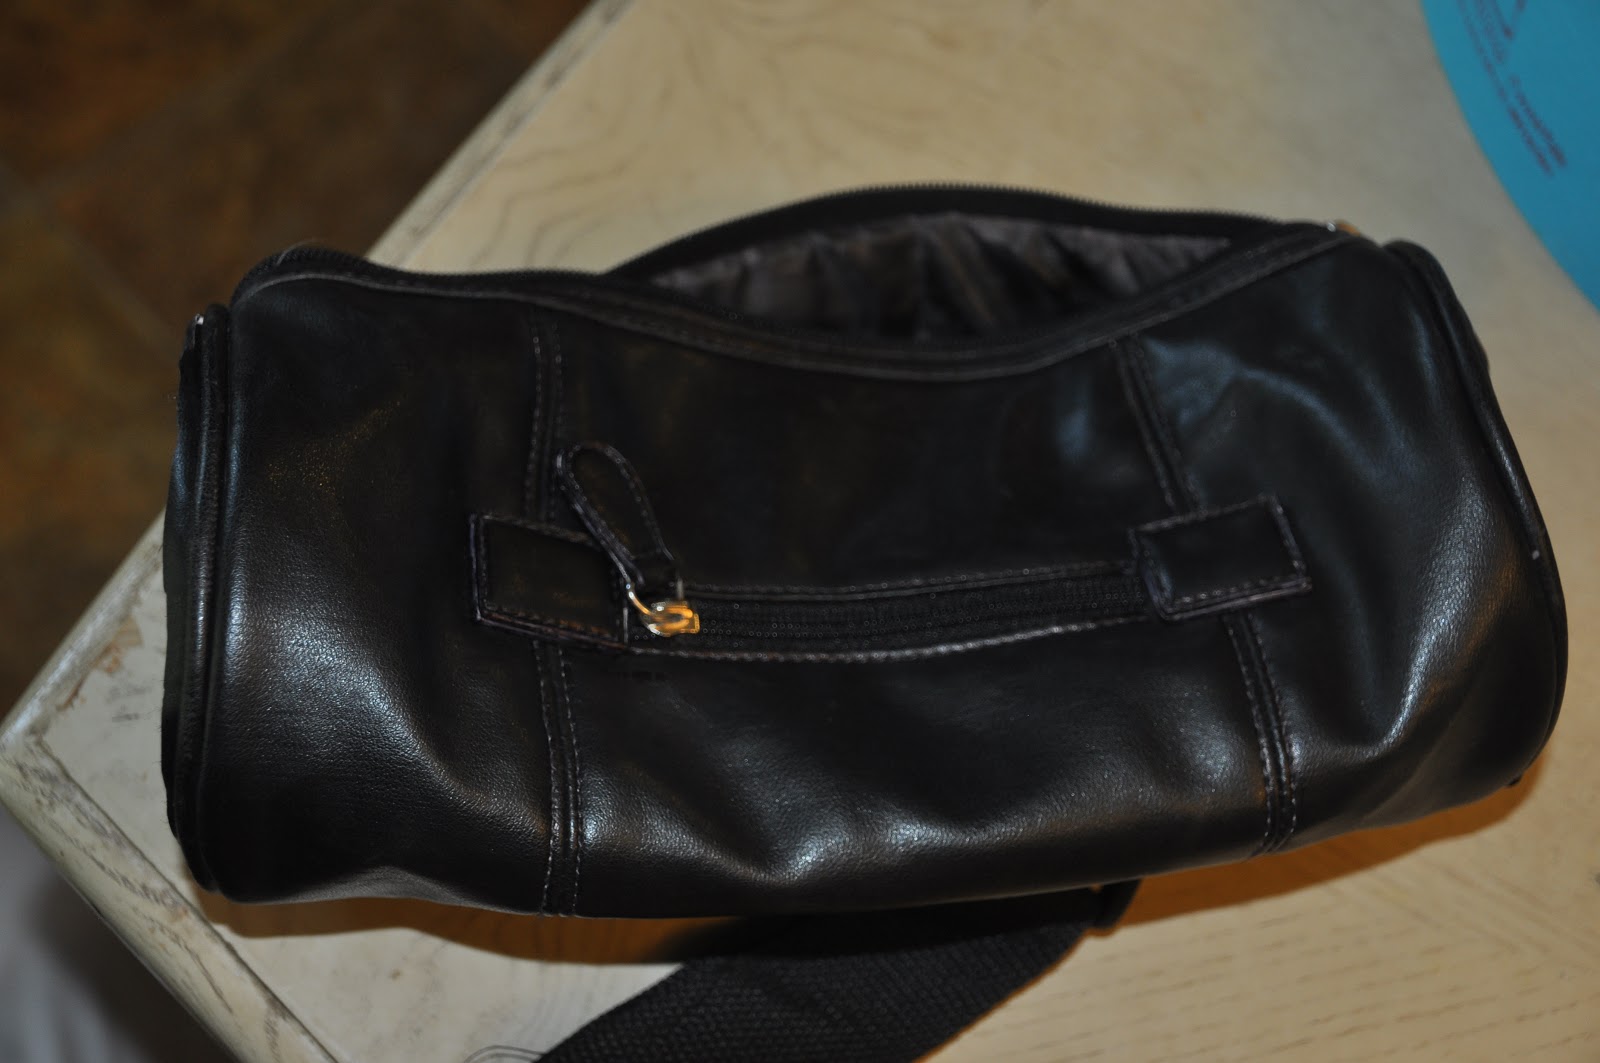
First I started with a tube style purse like this. (thrift store $2)

Then I cut off the handles and take a sharpie marker to the pink stitching. (the inside was pink as well, so I turned the purse inside out and used black spray paint so my son wouldn't freak out about having a pink arrow holder)
Then I thieve the shoulder strap off an old duffle bag I got from the thrift store for 99 cents. If you want, find a duffle bag with an adjustable strap and sew that onto your quiver so it'll grow with your kid. **When cutting strapping make sure you melt the raw edges with a lighter so they don't come unraveled**

Attach the strap (so the strap falls off the bottom) first to the purse. Open the main zipper and lay the purse flat while using your sewing machine so you don't sew both sides together. 


What the inside of the newly sewn on strap looks like.

Then sew on the other end of the strap. You want your quiver to be straight up and down on your back so sew the next part of your strap on so the strap goes off the side of the purse. At this point I have cut a hole on the same side of the purse for the arrows to go in.

Now, if you want it to be a little more ridged you add a hard foam to the base and to the. top of the quiver. This is from a foam target. Roll it as tight as you can get it. Then stuff it in the bottom of your quiver. Hot glue will keep it in place but the bottom doesn't really need it.

Picture of the inside of the quiver with foam in it. Now do the same only add it to the top.

(I apologies for the lighting, I took this with a phone camera) The top foam will hold better if you glue it to the edges of the purse. I also found that if you have enough foam making a cinnamon roll shape for the top and then poking the arrows in between the foam will keep them standing upright.


You now have a place for those arrows to sit while you practice your archery.